 “I love articles from Gallantry about starting fires!” - Chuck Nolan (Tom Hanks), perhaps, Cast Away (dir: Robert Zemeckis; 2000)
LIGHT MY FIRE
Let’s lay some cards face up on the table, shall we? The Gallantry Man has been using that hot fire for warmth, signaling, and cooking since DAY ONE. In terms of survival, heck, it doesn’t get more essential than fire.
Today, however, we’re going to be talking about lighting fires in those indoor/outdoor situations wherein your survival is not being imminently being threatened (though, to be honest, you’d be prepared if such a situation should arise). After all, during these cold (and, in some cases, downright frigid) nights of winter, there’s nothing better than a nice, warm fire to curl up next to. Man, it sounds good just seeing those words, doesn’t it? The late Jimmy Morrison sure was onto something when he declared “Come on, baby, light my fire”!
Good ol’ James M. aside, the thing is that you can’t just go ahead and start fires in order to warm yourself up unless you actually know how to build said fires. That’s precisely why we’re going to break down the basics of starting a fire both indoors (in a wood-burning fireplace) and outdoors (in a firepit) before highlighting a few of our favorite Gallantry Man lighters and knives for igniting sick blazes of glory and cutting some seriously gorgeous kindling.
 “I just read an article on Gallantry, and, well, I think we should start a fire inside tonight. Your fireplace will work just fine.”
STARTING AN FIRE…INDOORS
Starting a fire indoors, in a wood-burning fireplace, requires knowing what you’re doing. It’s an art form, really, and one that can be made stress-free when you make the wise decision to start your indoor fire on a day or night that isn’t extremely windy at that.
Let’s dive into the necessary steps to getting your indoor fire on.
1. LAY OUT YOUR TOOLS
Like preparing the perfect shake, starting a crackling indoor fire is all about having the right ingredients ready to go. In the case of starting an indoor fire, that means laying out your dry seasoned wood (the drier and more lightweight, the better, otherwise your spot will get waaay too smoky), kindling (about 20 thumb-sized small scraps of batoned dry wood, foraged twigs, sticks, or newspaper absent color or gloss that you have cut with your everyday carry knife), a sweet EDC lighter (who needs matches when you’ve got an epic EDC lighter, right?), your grate (optional, but we dig having one), plentiful amounts of newspaper, a metal bucket (that is, if your indoor fireplace has been previously used and has not been cleaned since), a fireplace shovel (again, if your indoor fireplace is dirty), and, lastly, an indoor fireplace screen (you know, like, for your indoor fireplace).
2. PREP THE BIG GUY (I.E. THE FIREPLACE)
If your fireplace is filled with ashes from a previous outing, clean that puppy by shoveling up the ashes and emptying them into a metal bucket (and then away from anything that can easily burn).
Once your fireplace is clean and ready for action, replace the heavy cold air in your chimney with lighter warm air (this is a process known as “priming the flue”) by rolling up a nice, hefty piece of newspaper into a stick, lighting one end of it with your lighter, and then holding it up towards your open fireplace damper (this built-in mechanism seals up your chimney when your fireplace isn’t being used). Repeat this process as necessary until you feel the flow of air reverse, an indicator that air is getting sucked up that ol’ chimney of yours.
Remember that metal bucket from earlier? Bring it back, then sprinkle some of that ash “sugar” (which will act as fuel and insulation for your fire) around in a clean layer on the floor of your fireplace (or under the grate you’ve set in it).
Finally, after you’ve made sure that your furnace is off, loosely ball up some of that newspaper you’ve got (somewhere between 14 and 16 pieces should do the trick) and push it on top of the ash in the center of your fireplace.
3. LAYER THE KINDLING
Take the kindling (i.e. the key to starting a spectacular fire) that you have already laid out nicely and stack it up in a crisscross arrangement (this will help air move between the different parts so that oxygen can be swiftly delivered to your fire) right on top of the grill.
4. LIGHT THE KINDLING
With your kindling in place, light some of that paper in a few different spots in order to make sure it all catches. While you may think your indoor fire has started at this juncture, we regret to inform you that it actually has not (that paper is going to be Gone in 60 Seconds), so keep pushing new balls of paper in from the sides in order to keep the flames going. Do this for a long enough period of time that the balls of paper can properly catch your kindling on fire.
 “Honey. It’s time…to load up the logs for the indoor fire.”
5. LOAD UP THE LOGS
Are you ready to add some dry logs to what you’ve got far? Good. Keep the crisscross party going and add them (remember, it is always best to use seasoned wood, which can be identified by both the cracks at its ends as well as its general dark appearance) as such in a stack on top of the kindling. The real trick with this step is to make sure that you’ve got enough space leftover between the logs so that air can still sneak through them.
6. TEND TO YOUR HOT FIRE LIKE A BOSS
If you’ve gotten to this step without any problems, give yourself a well-deserved pat on the back. After all, this signals that you’ve used some sufficiently dry logs like a true Gallantry Man legend and that you now truly deserve to enjoy the fruits of your labor. So put your screen up, crack a nearby window, fix yourself a smart cocktail, and warm up by the fire that you’ve just literally willed (okay, yes, with the help of a lighter) into existence.
7. RELOAD THAT BABY (AS NEEDED)
While you may be tempted to just go bonkers by adding tons of wood to your fire at once, don’t. Only when the fire has begun to actually burn down should you gently add some fresh logs to the top of it, moving them around as needed until they all have enough air to catch. Inserting a few more newspaper balls into choice crevices is also a clutch move at this stage in the game, as doing so will really help the “catch”.
THE (INDOOR FIRE) GOLDEN RULE
Remember, no matter how badly you may want to throw some gasoline on your logs in order to create a larger blaze, DON’T DO IT! The last thing you want to do is turn your nice, Gallantry Man indoor fire into the set of a bad Backdraft sequel, you know what we mean?
 “How frickin’ crackling and spluttering was that fireplace last night, babe?”
 “Nice work on the indoor fire, but let’s get moving on the outdoor firepit one. Chop, chop! C’mon! Put that friggin’ coconut down and let’s go!”
STARTING A FIRE…OUTDOORS
Starting a fire indoors is awesome. You know what else is awesome? Starting a fire outdoors in a firepit. Heck, we’d go so far as to say that becoming highly capable in the art of building (and starting) fires outdoors is one of the most Gallantry Man skills you could ever possibly learn (hey, it saved Chuck Nolan’s life in Cast Away and it could save yours one day, too!). However, similar to starting a fire indoors, the necessary skill set involved here also requires that you know what you’re doing. So let’s get into how light it up outdoors, because if you build your outdoor firepit like a boss, the fire will come!
 “Well I’ll be damned. That spot over there looks like a great place to start a fire!”
1. SELECT THE PERFECT LOCATION
The drier the spot, the better (just like your stockpile of logs). Clear a perimeter between 8 to 10 feet around where you’d like to start your fire, then dig out a few inches of soil from the center of your declared fire ring.
 “TINDER DUST!!!!!!!!!!!!!!”
2. GET YOUR TINDER READY
While you absolutely could just rip some dried bark off a dead tree for your tinder, we suggest being prepared (because of we course do, we’re Gallantry) ahead of time with a couple tins of Tinder Dust (leftover shavings that burn even when wet).
 “Yup. Twelve marks for twelve inches of tinder bed. Now that’s how you do the center of a fire ring!”
Then, in the center of your fire ring, make a nice bed of tinder (for your kindling to “sleep” on) that is about a foot long in diameter.
 “Haha! Time to prep the kindling, baby! It’s almost fire time!”
3. CUT UP YOUR KINDLING
As you already know, kindling, which you will be tucking under your firewood, is a crucial ingredient for building a fire. Go ahead and use your everyday carry blade to cut yourself some twigs and small branches between 1/8” and ½” in diameter (kindling should be bigger and more dense than your tinder).
Alright! You’re really rocking and rolling now!
Let’s proceed.
 “Okay, these are definitely not logs.”
4. GET THE (RIGHT) LOGS PREPPED
Your firewood should be anywhere from 1” to 5” in diameter. Whether you choose to use whole logs or split logs (from larger pieces of wood) is up to you, hoss. What’s important here is that you check the interior of each piece of wood that you intend to use for your fire in order to make sure it is sufficiently dry (the drier the wood, the longer it will stay lit).
 “C’mon, buddy. You know what to do. Set up those two tipis that you learned about from the Gallantry article right on over there.”
5. TIPI TIME!
The “Tipi” method (which actually involves building 2 “tipis”) might be basic as a method of lighting a fire outdoors, but it works like a champ for lighting quick fires that provide remarkably even heating (not to mention fires that are perfect for cooking).
For your first “mini” tipi, you’re going to want to arrange your kindling just like a tipi over your tinder in the middle of your fire ring. This little guy will be the core of your future fire.
For your second “big” tipi, you’re going to want to arrange a larger tipi of firewood over your mini tipi by leaning your logs against each other upright (while of course not forgetting to leave space for air and your lighter along the way).
6. LIGHT YOUR FIRE
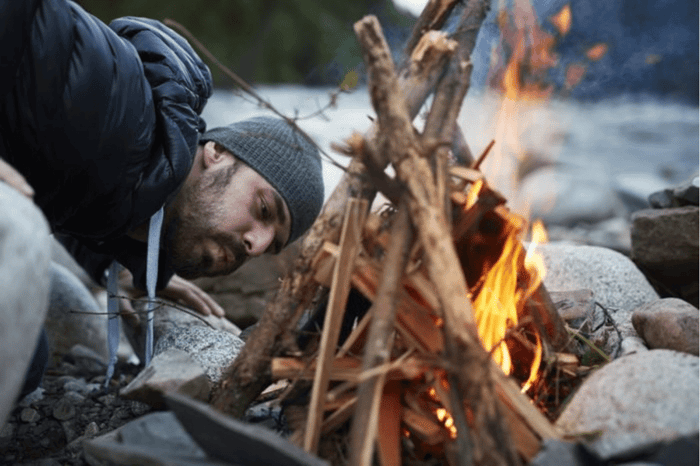
Concentrate the flame of your everyday carry lighter onto a single, focused point on your nice, dry, fine tinder and watch the hot flames spread (in other words, you don’t have to light your tinder in multiple spots, though you can if you so please) up through your kindling before work its way into the larger tipi wood.
7. JUST BREATHE
Breathe gently onto the flame so that it can slowly grow.
8. TIME FOR A TOP-OFF
Softly add burning tinder to the tinder that you’ve already got underneath your fire. Give your fire a beat or two, then keep adding more “fuel” to the fire.
9. BRING OUT MORE WOOD FOR MORE FIRE
Keep an eye on your stunning fire, and, when it is called for, keep adding more wood to it so that baby can keep burning Lionel Richie-style i.e. “All Night Long”.
Want a bigger firepit fire? Add more wood to it as needed.
Want to put your firepit concoction out? Sprinkle (but don’t pour) water onto those flames.
 “My Gallantry Man fire. It’s so beautiful.”
BOOM!
Now that we’ve covered how you can build your very own indoor and outdoor Gallantry Man fires, let’s check out some knives, specifically some of our stainless steel pocket folders and fixed-blade high carbon steel (perfectly-crafted for hard use) favorites.
The time to get you cutting your kindling like a straight-up legend is RIGHT NOW!
 “I’m going to cut this coconut like I cut my kindling – with an awesome everyday carry knife from Gallantry! Specifically the Juniper Black 37G from Deejo or the Baby Banter Linerlock Knife from Civivi!”
First up, we’ve got…
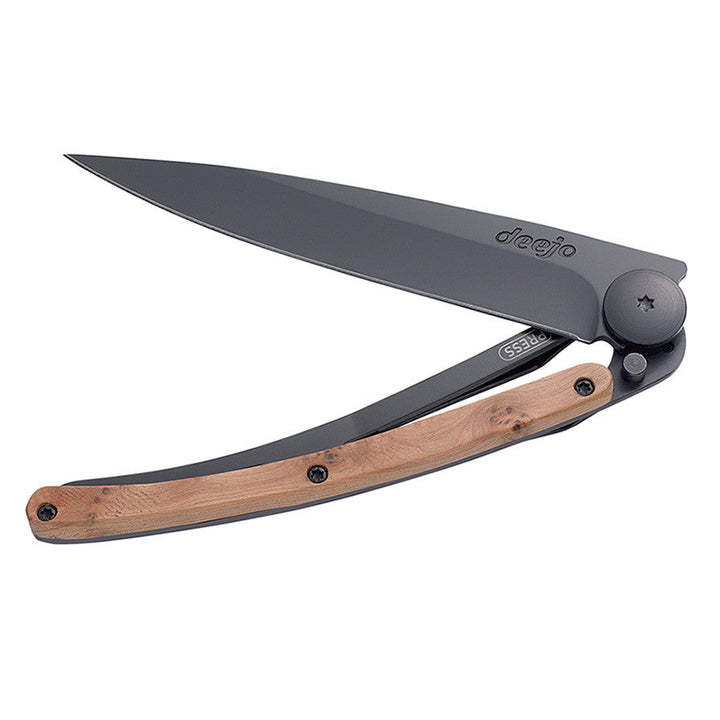
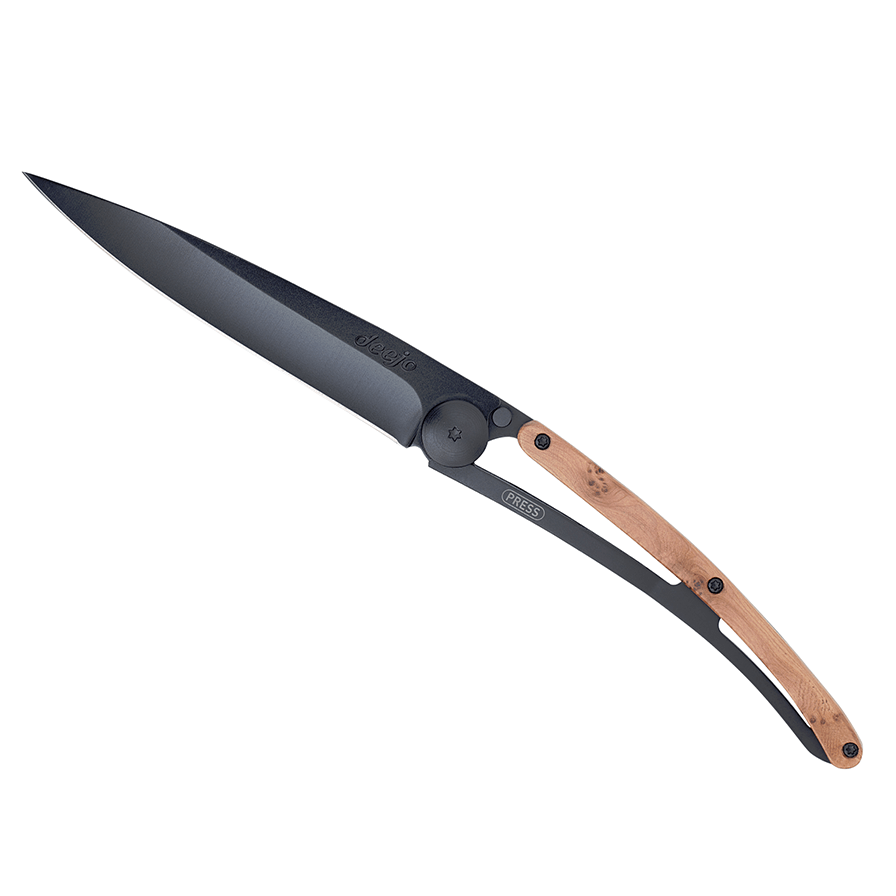
THE JUNIPER BLACK 37G FROM DEEJO
The Deejo Black line of super-light pocket knives is an elegant and stylish take on the classic everyday carry tool. Named the 37g for its total weight - about 1.31 ounces - these knives feature a black titanium-coated 420 stainless steel blade alongside a combination 420 stainless steel and matte finished rare wood handle that looks as good as it feels. With a secure liner lock and belt clip, you can bet your bottom dollar that this blacked-out beauty is a handsome addition to any EDC arsenal.
SPECIFICATIONS
- Titanium-coated 420 stainless steel blade
- Juniper wood and stainless steel handle
- Matte finish
- Liner lock and belt clip
- Total length 8"
- Blade length 3.75"
- Weighs 1.31oz
37g Knife
$90.00
[tab-section data-sc-active-background="#ffffff" data-sc-other-background="#ffffff" data-sc-color="#555555"][tab title="Details"] The Deejo Black line of super-light pocket knives is an elegant and stylish take on the classic everyday carry tool. Named the 37g for its total weight - about 1.31 ounces - these knives feature a… read more
If this blade steel isn’t hard enough for you, may we suggest…
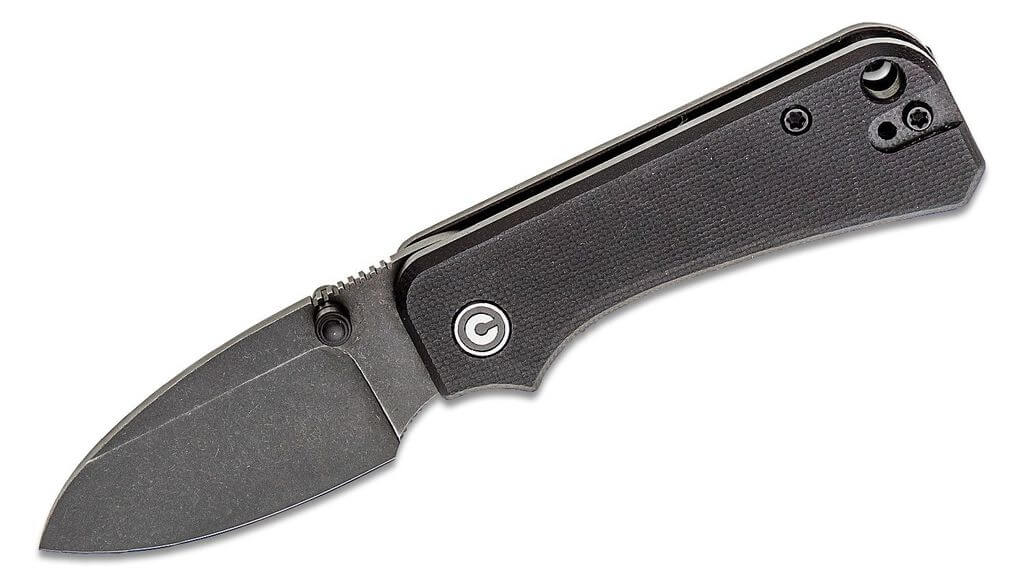
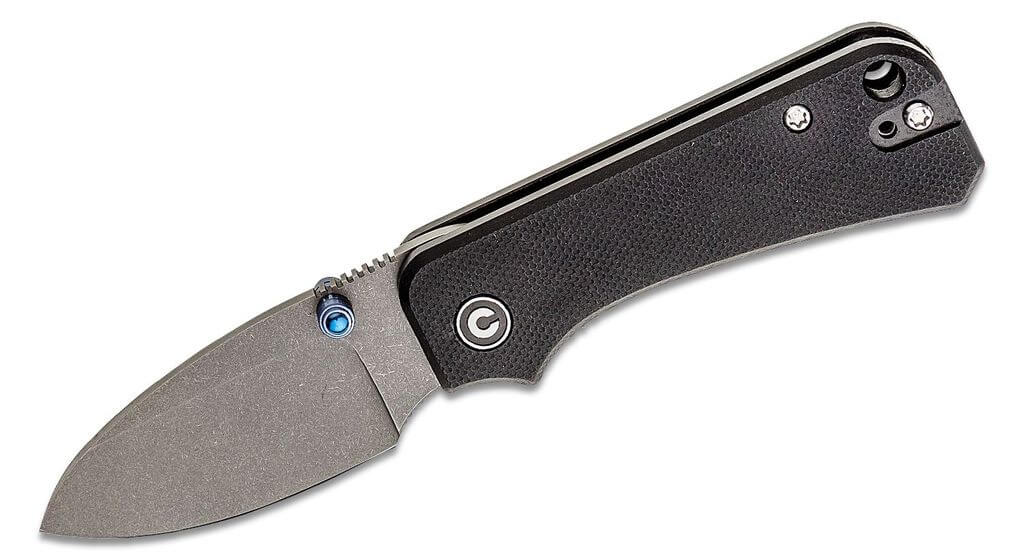
THE BABY BANTER LINERLOCK KNIFE FROM CIVIVI
Don’t let the pint-size fool here fool you because the Baby Banter, designed by Ben Petersen for Civivi, packs one heck of a powerful punch. With just under a 5.5" overall length, the Baby Banter is imminently carryable, too (see the convenient lanyard hole in the handle).
Featuring Nitro-V steel, which contains nitrogen for added hardness, the Baby Banter can both stand up to everyday use and hold an edge. Plus, not only is its G10 handle sturdy and comfortable, its dual thumb studs offer options for opening.
Ben Petersen set out to craft the ultimate EDC knife with this gem, and we think he most definitely hit the bullseye.
Baby Banter Linerlock Knife
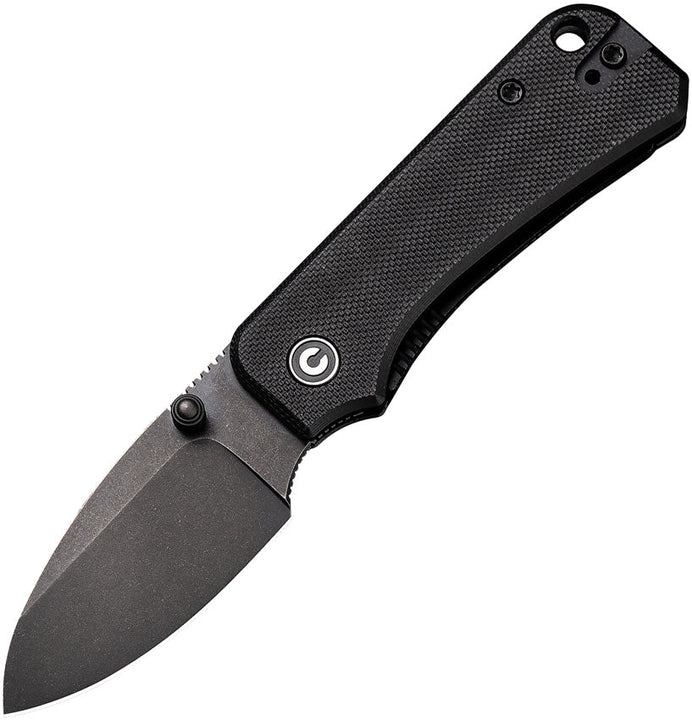
$69.95
[tab-section data-sc-active-background="#ffffff" data-sc-other-background="#ffffff" data-sc-color="#555555"][tab title="Details"] Designed by Ben Petersen, the Baby Banter packs a powerful punch in a pint-sized form. At just under 5.5" overall length, the Baby Banter is imminently carryable, with a convenient lanyard hole in the handle. … read more
Baby Banter Linerlock Knife
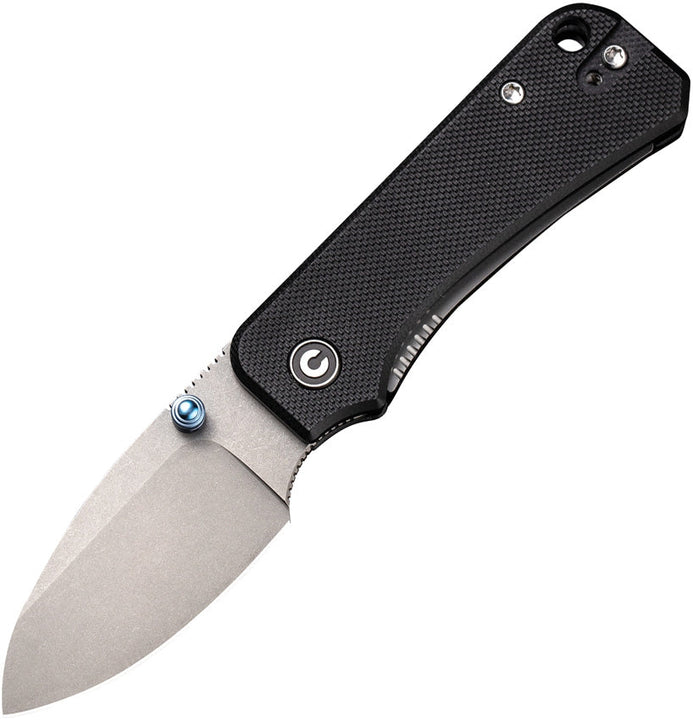
$69.95
[tab-section data-sc-active-background="#ffffff" data-sc-other-background="#ffffff" data-sc-color="#555555"][tab title="Details"] Designed by Ben Petersen, the Baby Banter packs a powerful punch in a pint-sized form. At just under 5.5" overall length, the Baby Banter is imminently carryable, with a convenient lanyard hole in the handle. … read more
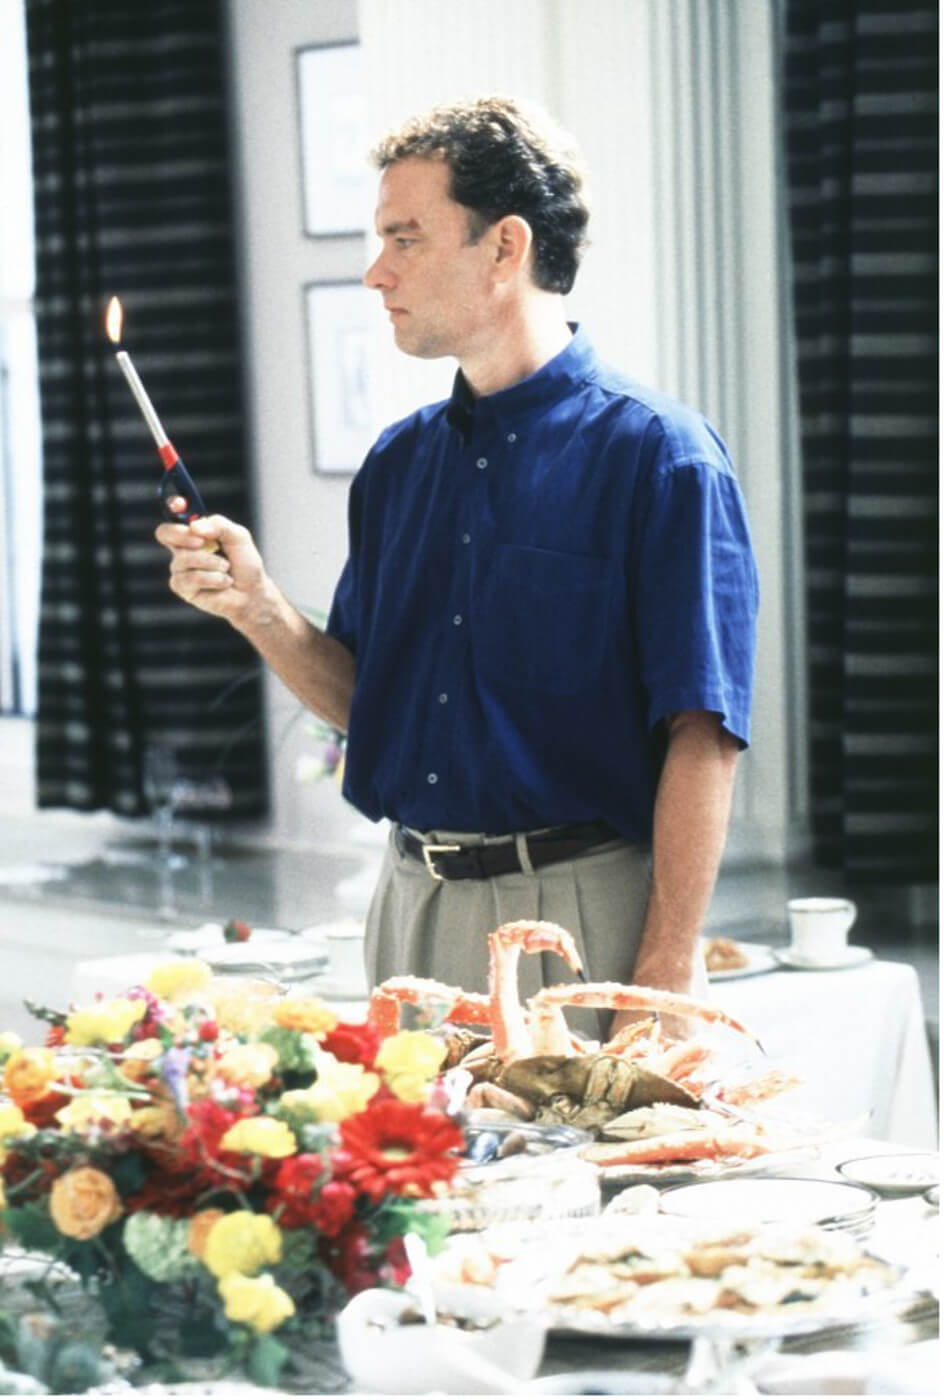
“This is not the Zippo Saloon Skull or Don’t Tread on Me® lighter that you can buy from Gallantry, that’s for sure.”
You’ve got your everyday carry knife - or knives (!) - to cut kindling with, now you just need one (or two!) rad lighters for igniting those fires. Speaking of lighters, can you even get more Americana than Zippo? We think not.
Zippo is the quintessential American lighter. It is the household name that you automatically think of when you think of lighters, because the brand is synonymous with quality (all Zippo lighters come with a lifetime guarantee). The all-metal construction and windproof design of each and every Zippo allows you to use your lighter anywhere, anytime, which is great since every Zippo is also refillable for a lifetime of enjoyment.
Check this bad boy out…
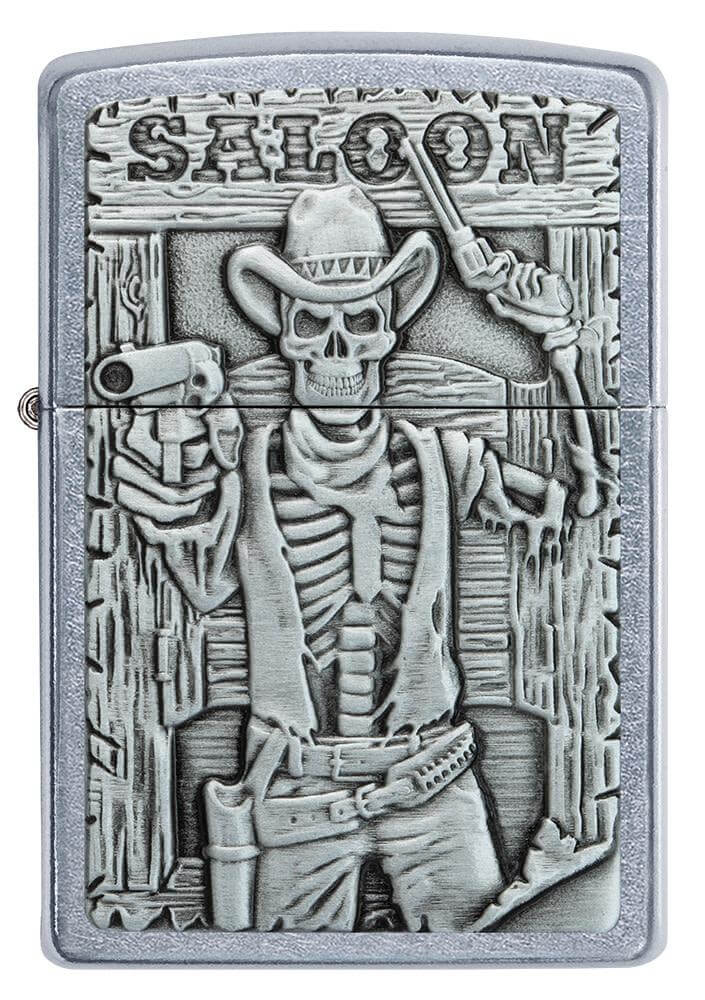
THE SALOON SKULL ZIPPO LIGHTER FROM ZIPPO
This edition of the classic Zippo Street Chrome™ lighter features a supremely cool, ready-to-duel gunslinging skeleton design on its emblem.
Oh yeah. It’s smokin’!
SPECIFICATIONS
- Genuine Zippo windproof lighter with distinctive Zippo "click"
- All metal construction; windproof design works virtually anywhere
- Made in USA; Lifetime guarantee by Zippo
- Dimensions: 2.25" x 0.5" x 1.5"
Saloon Skull Zippo Lighter
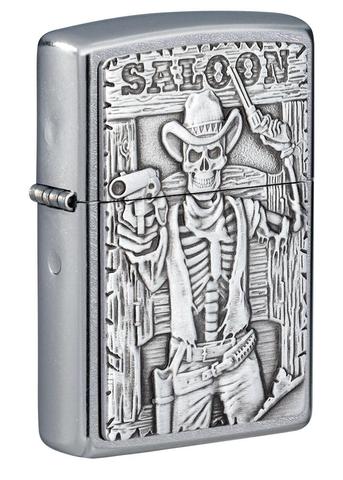
$44.95
[tab-section data-sc-active-background="#ffffff" data-sc-other-background="#ffffff" data-sc-color="#555555"][tab title="Details"] Zippo is the quintessential American lighter, the household name you automatically think of, because it stands for quality and is lifetime guaranteed by Zippo. The all-metal construction of each Zippo and windproof design mean you… read more
Oh, and don’t forget about this killer EDC lighter, either…
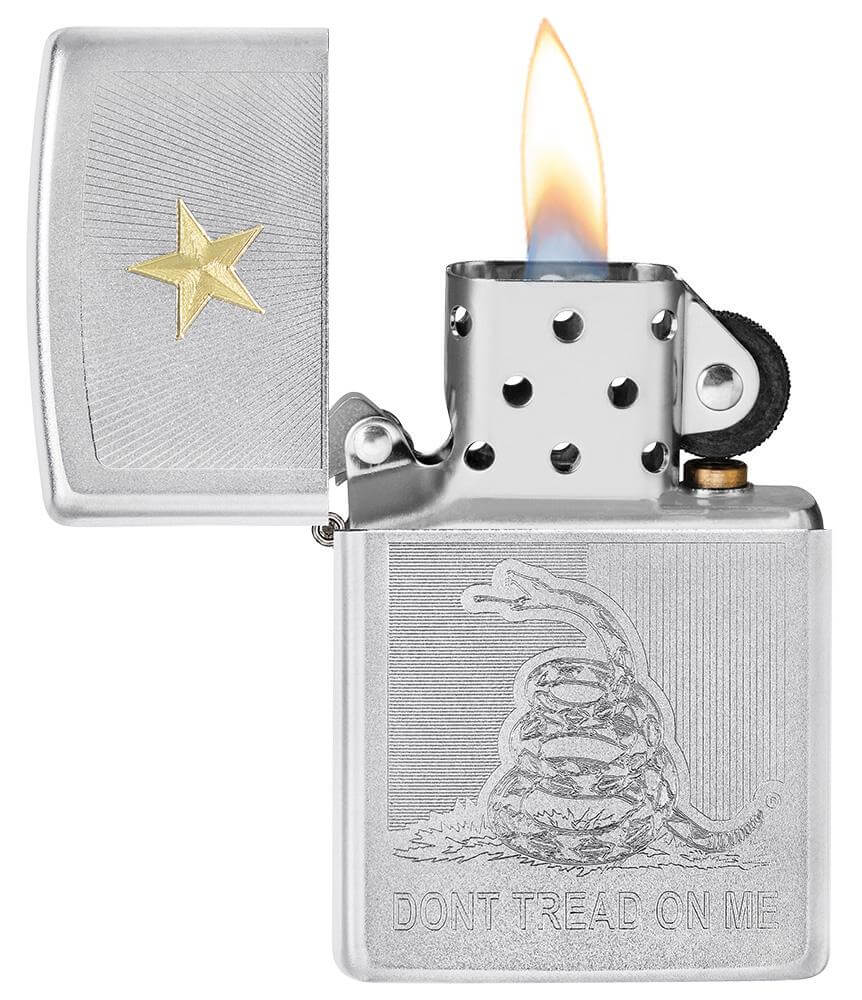
DON’T TREAD ON ME ZIPPO LIGHTER
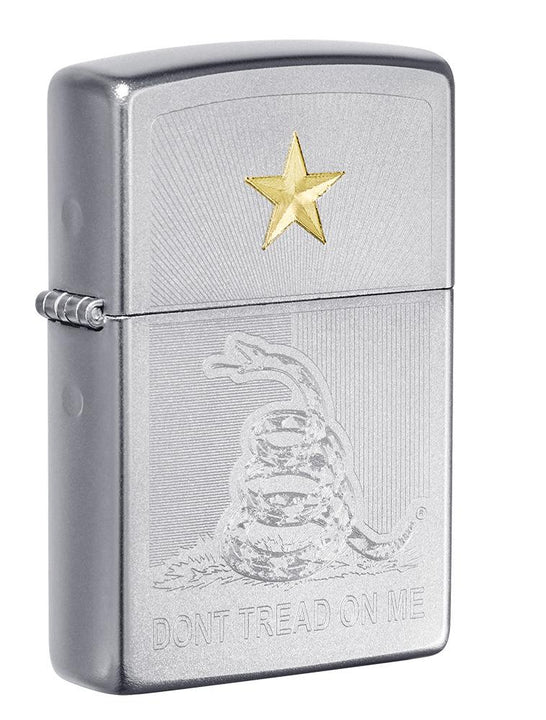
A laser Two-Tone process is used to create the two different design depths (look between the coiled snake above the "Don't Tread on Me®" expression and the star on the lid) displayed by the iconic Gadsden Flag on this badass Satin Chrome lighter.
Um, can you say “America”?
Don't Tread On Me Zippo Lighter
$26.95
[tab-section data-sc-active-background="#ffffff" data-sc-other-background="#ffffff" data-sc-color="#555555"][tab title="Details"] Zippo is the quintessential American lighter, the household name you automatically think of, because it stands for quality and is lifetime guaranteed by Zippo. The all-metal construction of each Zippo and windproof design mean you… read more
 “Man, I would look a whole lot cooler right now if I had a bunch of everyday carry from Gallantry on me, especially those cool knives and lighters featured in this week’s The Dispatch.”
THE LAST WORD ON STARTING FIRES
By now, you should absolutely feel like you can talk the talk and walk the walk when it comes to starting fires both indoors and outdoors. Sure, we could pontificate on how you could start fires without a sweet everyday carry lighter (head over to The Art of Manliness for a great explainer HERE), but you’re a Gallantry Man, so to imagine a scenario wherein you’re unprepared is honestly just plainly inconceivable to us. Plus, with your fresh new everyday carry blade/lighter combo from Gallantry, you’ll be cutting kindling and lighting flames less like Tom Hanks or that volleyball (‘Sup, Wilson?) from Cast Away and more like RAMBO!
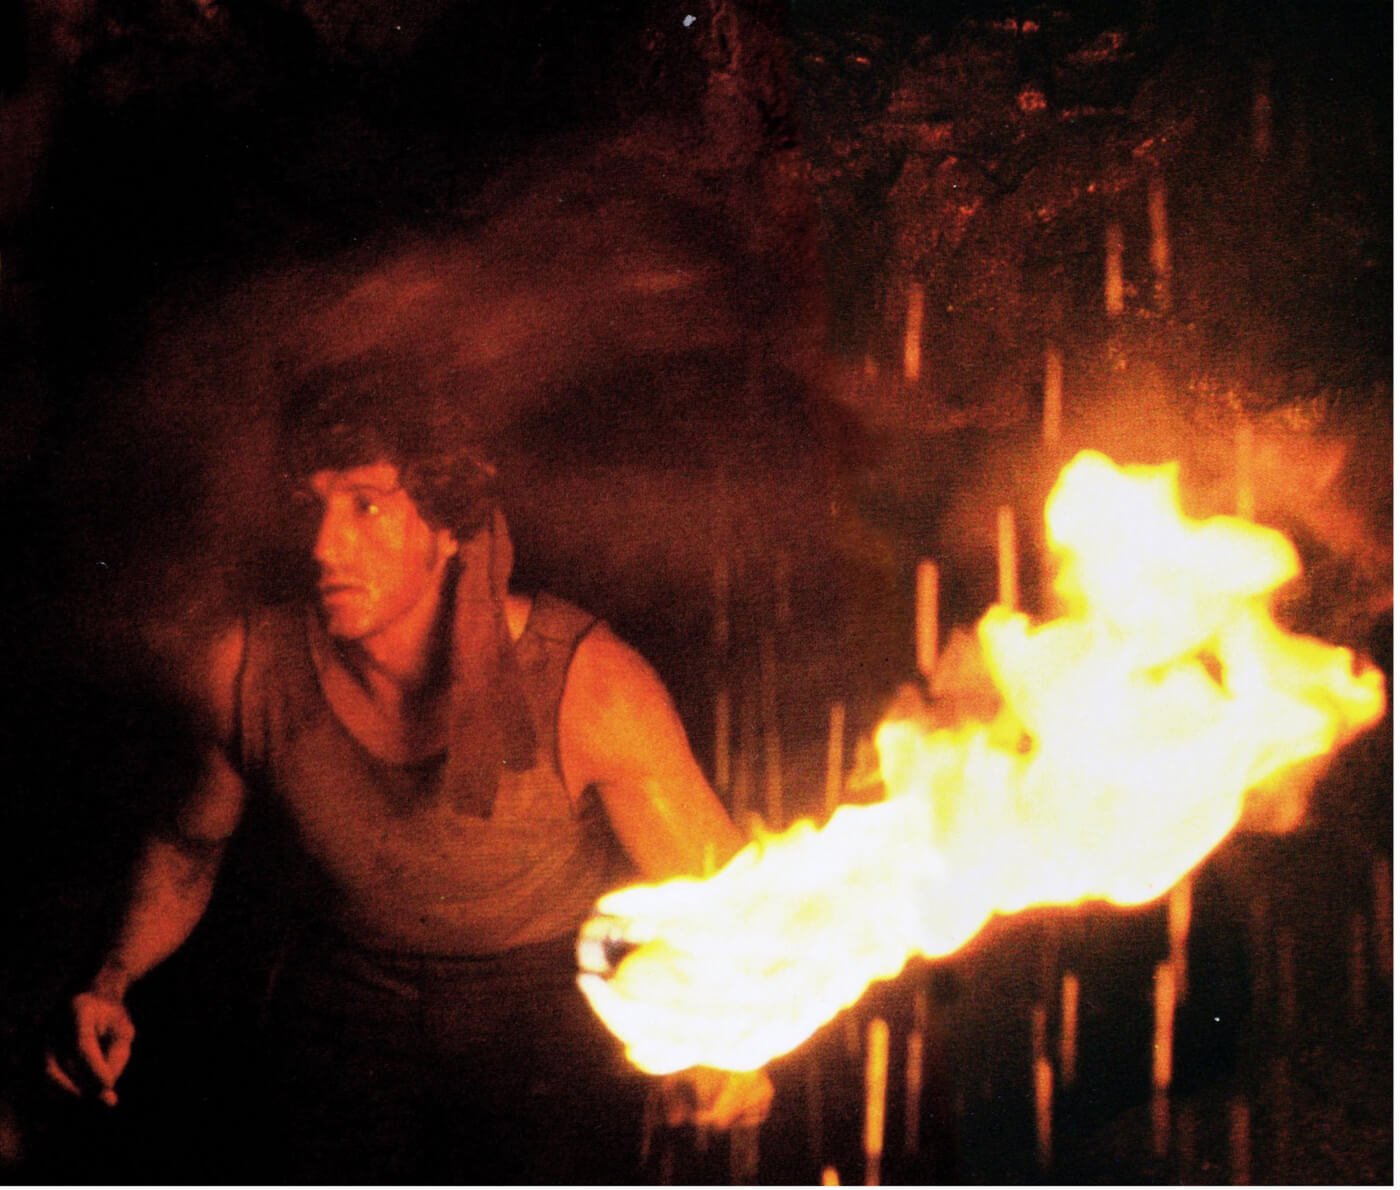 “I got your fire right here, Tommy Hanks!”
Oh, and one more thing…
MERRY CHRISTMAS, Y’ALL!
Yes! The heat is officially on!
Seriously, though, this Christmas you have just got to gift yourself or a loved one (or both!) with the everyday carry tools needed to start a fire indoors or outdoors because Gallantry Man fires stay lit!
STREAMING THE FIRE
 “Hold on just one minute. Is that a new issue of The Dispatch from Gallantry in my inbox? Tell the President he can wait!”
All this talk of fire has got us in the mood for some, you know it, In the Line of Fire!
This 1993 Action/Thriller, directed with R-rated perfection by Wolfgang Petersen (Troy, Air Force One), follows veteran Secret Service agent Frank Horrigan (Clint Eastwood), still haunted by his failure to save President John F. Kennedy back in 1963, as he chases down a brilliant yet twisted assassin, Mitch “Booth” Leary (John Malkovich), who enjoys tormenting Frank while he carefully plans to assassinate the current president.
With a stellar supporting cast that includes Rene Russo, Dylan McDermott, Gary Cole, and John Mahoney, this is one classic 90’s flick that you definitely won’t regret watching! Stream it on Netflix while you can right HERE!


 “You know what time it is, brother. It’s time to get after it and make it a Gallantry Christmas for real, because, well, IT IS!”